Bootstrap Offset Tooltip
Intro
It is actually great whenever the content of our pages just fluently arranges over the entire width offered and suitably modify sizing and also order when the width of the display screen changes however sometimes we need letting the components some space around to breath with no extra elements around them considering that the balance is the solution of getting pleasant and light visual appeal quickly delivering our web content to the ones checking out the webpage. This free territory together with the responsive activity of our web pages is certainly an essential component of the layout of our webpages .
In the current edition of the most famous mobile phone friendly framework-- Bootstrap 4 there is a specific set of tools applied to situating our features exactly where we need them and modifying this placing and visual appeal baseding upon the width of the display page gets shown.
These are the so called Bootstrap Offset Class and push / pull classes. They perform really easy and in user-friendly style happening to be combined by having the grid tier infixes like -sm-, -md- and so forth.
Steps to use the Bootstrap Offset Example:
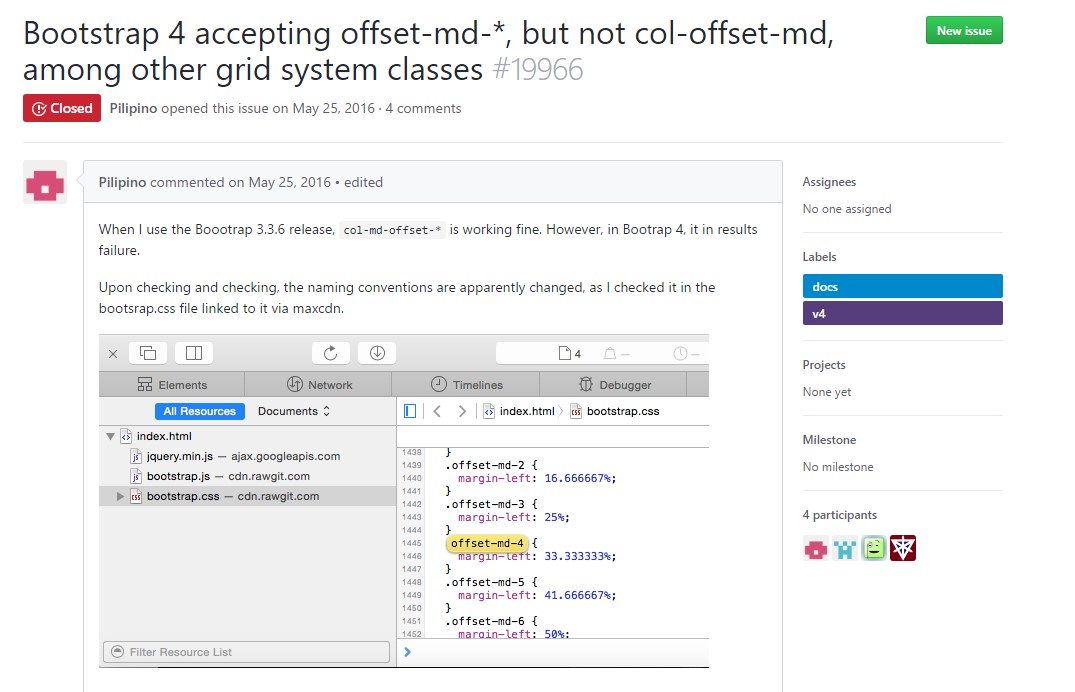
The ordinary syntax of these is pretty much easy-- you have the action you ought to be utilized-- such as .offset as an example, the smallest grid scale you need it to utilize from and above-- such as -md plus a value for the desired action in variety of columns-- like -3 for example.
This whole thing put together results .offset-md-3 which will offset the desired column element with 3 columns to the right from its default position on medium screen sizes and above. .offset classes always shifts its content to the right.
This all factor put together results .offset-md-3 which will offset the wanted column feature with 3 columns to the right starting with its default setting on medium display dimensions and above. .offset classes constantly transfers its web content to the right.
Representation
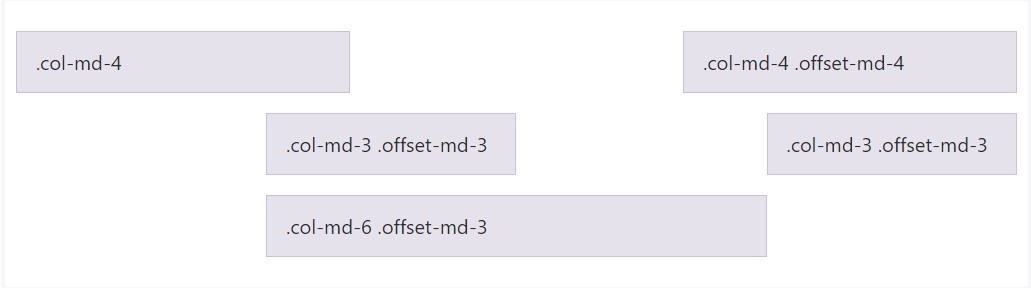
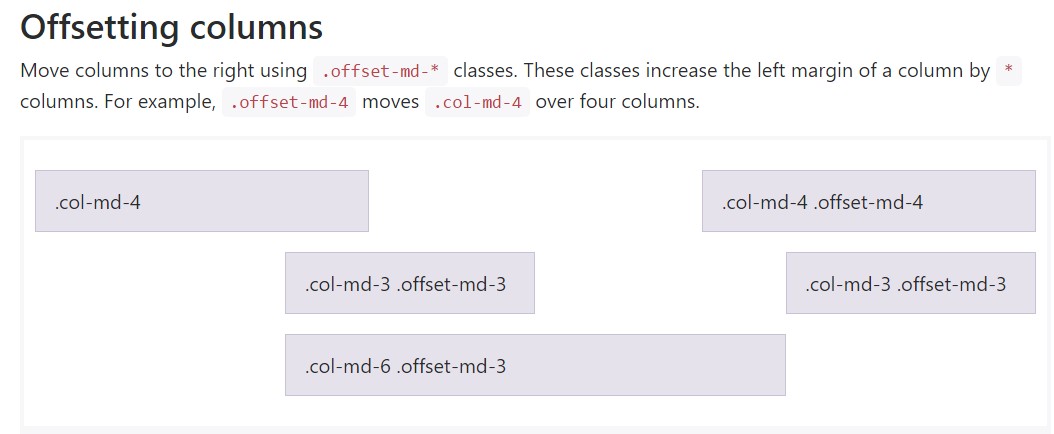
Move columns to the right using .offset-md-* classes. These particular classes improve the left margin of a column by * columns. As an example,.offset-md-4 drive .col-md-4 over four columns.
<div class="row">
  <div class="col-md-4">.col-md-4</div>
  <div class="col-md-4 offset-md-4">.col-md-4 .offset-md-4</div>
</div>
<div class="row">
  <div class="col-md-3 offset-md-3">.col-md-3 .offset-md-3</div>
  <div class="col-md-3 offset-md-3">.col-md-3 .offset-md-3</div>
</div>
<div class="row">
  <div class="col-md-6 offset-md-3">.col-md-6 .offset-md-3</div>
</div>
Significant detail
Important thing to consider right here is following directly from Bootstrap 4 alpha 6 the -xs infix has been terminated in this way for the smallest display dimensions-- under 34em as well as 554 px the grid size infix is rejected-- the offsetting instruments classes get followed with wanted number of columns. So the illustration directly from just above is going to develop into something such as .offset-3 and will work with all display screen sizes unless a standard for a wider viewport is determined-- you are able to do that by simply just designating the proper .offset- ~ some viewport size here ~ - ~ some number of columns ~ classes to the identical component.
This procedure functions in scenario when you have to format a particular component. In case that you however for some kind of factor intend to displace en element baseding on the ones besieging it you have the ability to employ the .push - and also .pull classes which in turn generally perform the very same thing but filling up the free living space left behind with the following component when possible. And so for example in the case that you possess two column components-- the first one 4 columns large and the second one-- 8 columns wide (they both equally fill the full row) utilizing .push-sm-8 to the first component and .pull-md-4 to the 2nd will effectively reverse the order in what they get presented on small viewports and above. Dropping the –xs- infix for the most compact display sizes counts here too.
And at last-- considering that Bootstrap 4 alpha 6 exposes the flexbox utilities for installing content you are able to likewise employ these for reordering your material using classes like .flex-first and .flex-last to place an element in the starting point or at the finish of its row.
Final thoughts
So ordinarily that is certainly the manner the most essential features of the Bootstrap 4's grid structure-- the columns become assigned the preferred Bootstrap Offset Button and ordered exactly in the manner that you desire them regardless the way they take place in code. However the reordering utilities are pretty impressive, what needs to be shown primarily really should in addition be defined first-- this will definitely likewise keep it a lot easier for the people reading your code to get around. But certainly it all depends on the certain case and the goals you're intending to accomplish.
Review some online video short training regarding Bootstrap Offset:
Connected topics:
Bootstrap offset authoritative documentation
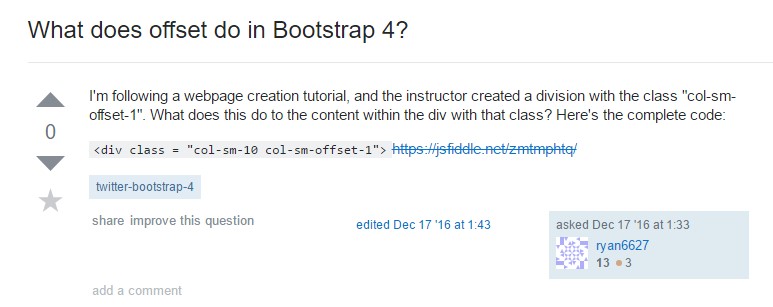
What does offset do in Bootstrap 4?
Bootstrap Offset:question on GitHub